Expanding your business internationally opens exciting new opportunities, but it also introduces complexities like import duties and taxes. Accurately tracking these costs is crucial for maintaining healthy profit margins. Good news! Odoo's Landed Cost feature simplifies this process, giving you a clear and comprehensive view of your product valuation.
This feature allows you to allocate costs like freight, insurance, and import duties directly to your products, ensuring your inventory valuation reflects the true cost of goods. This leads to more accurate profit & loss reporting and better-informed decision-making.
Here's a step-by-step guide to setting up Landed Costs in Odoo:
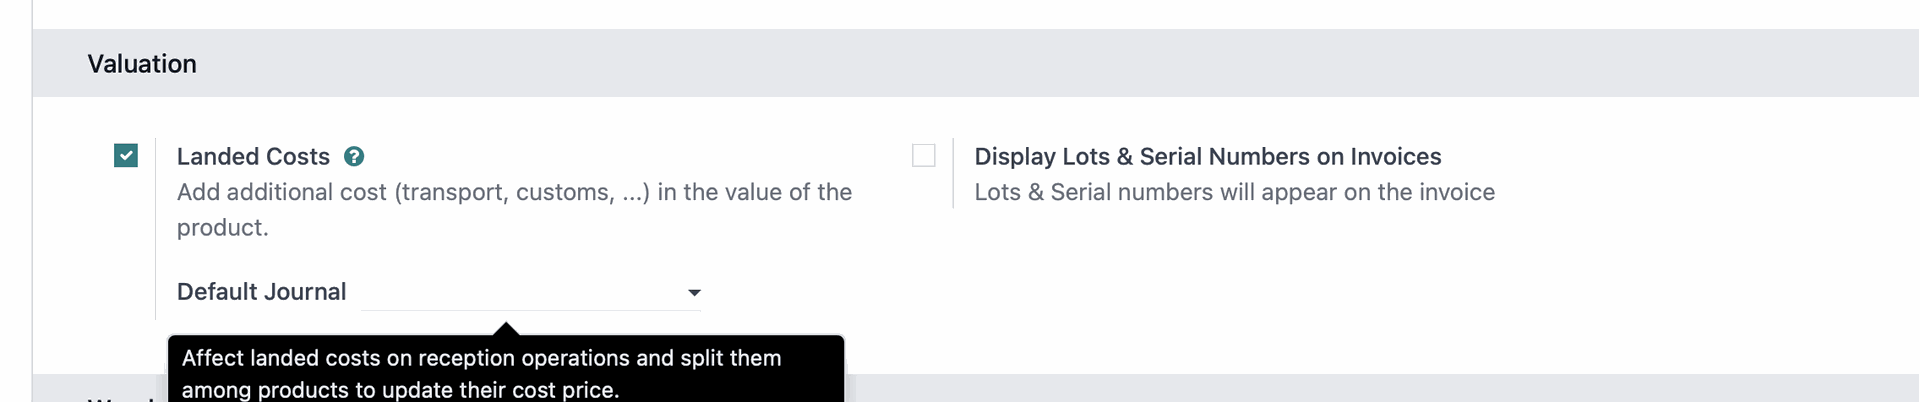
- Enable Landed Costs and Configure Product Categories:
- Navigate to Inventory > Configuration > Settings and under the Valuation section, ensure Landed Costs is ticked.
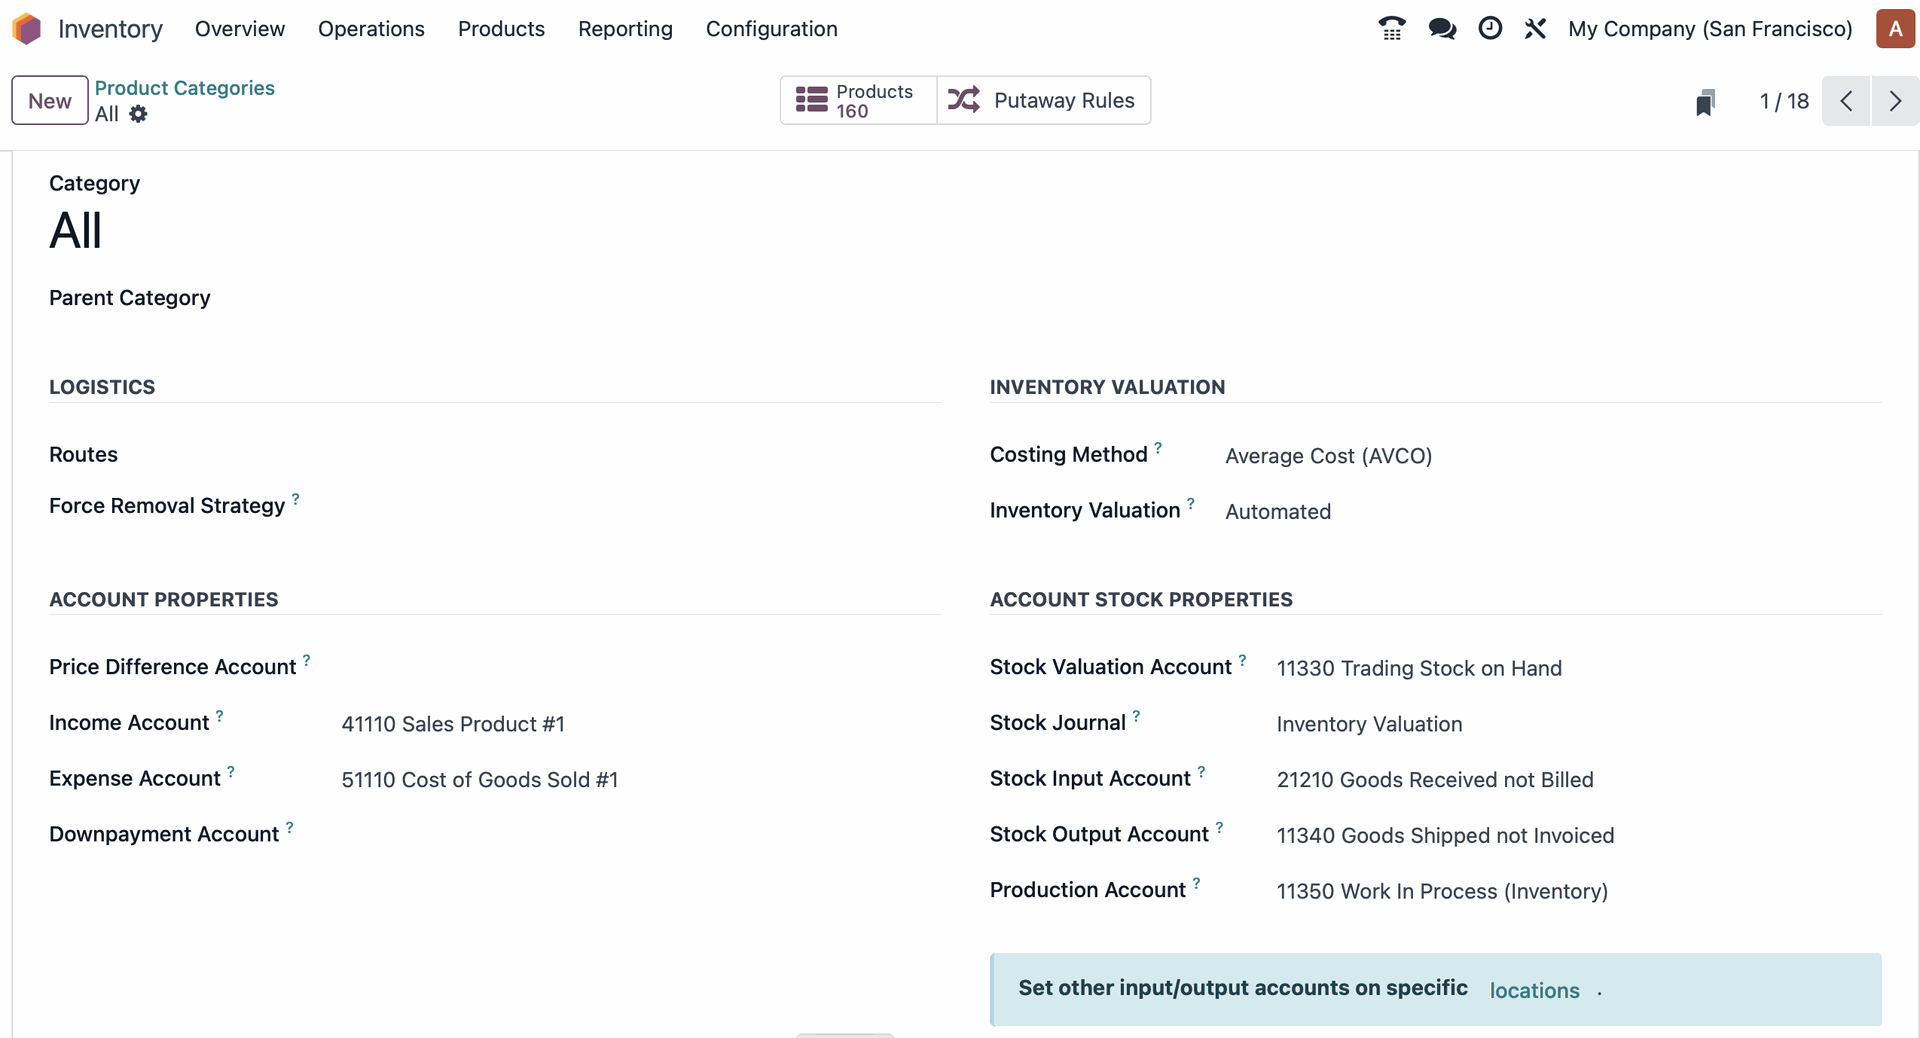
- Go to Configuration > Product Categories and open the "All" category. Under Inventory Valuation, confirm that the Costing Method is set to Average cost (AVCO) and the Inventory Valuation is set to Automated.
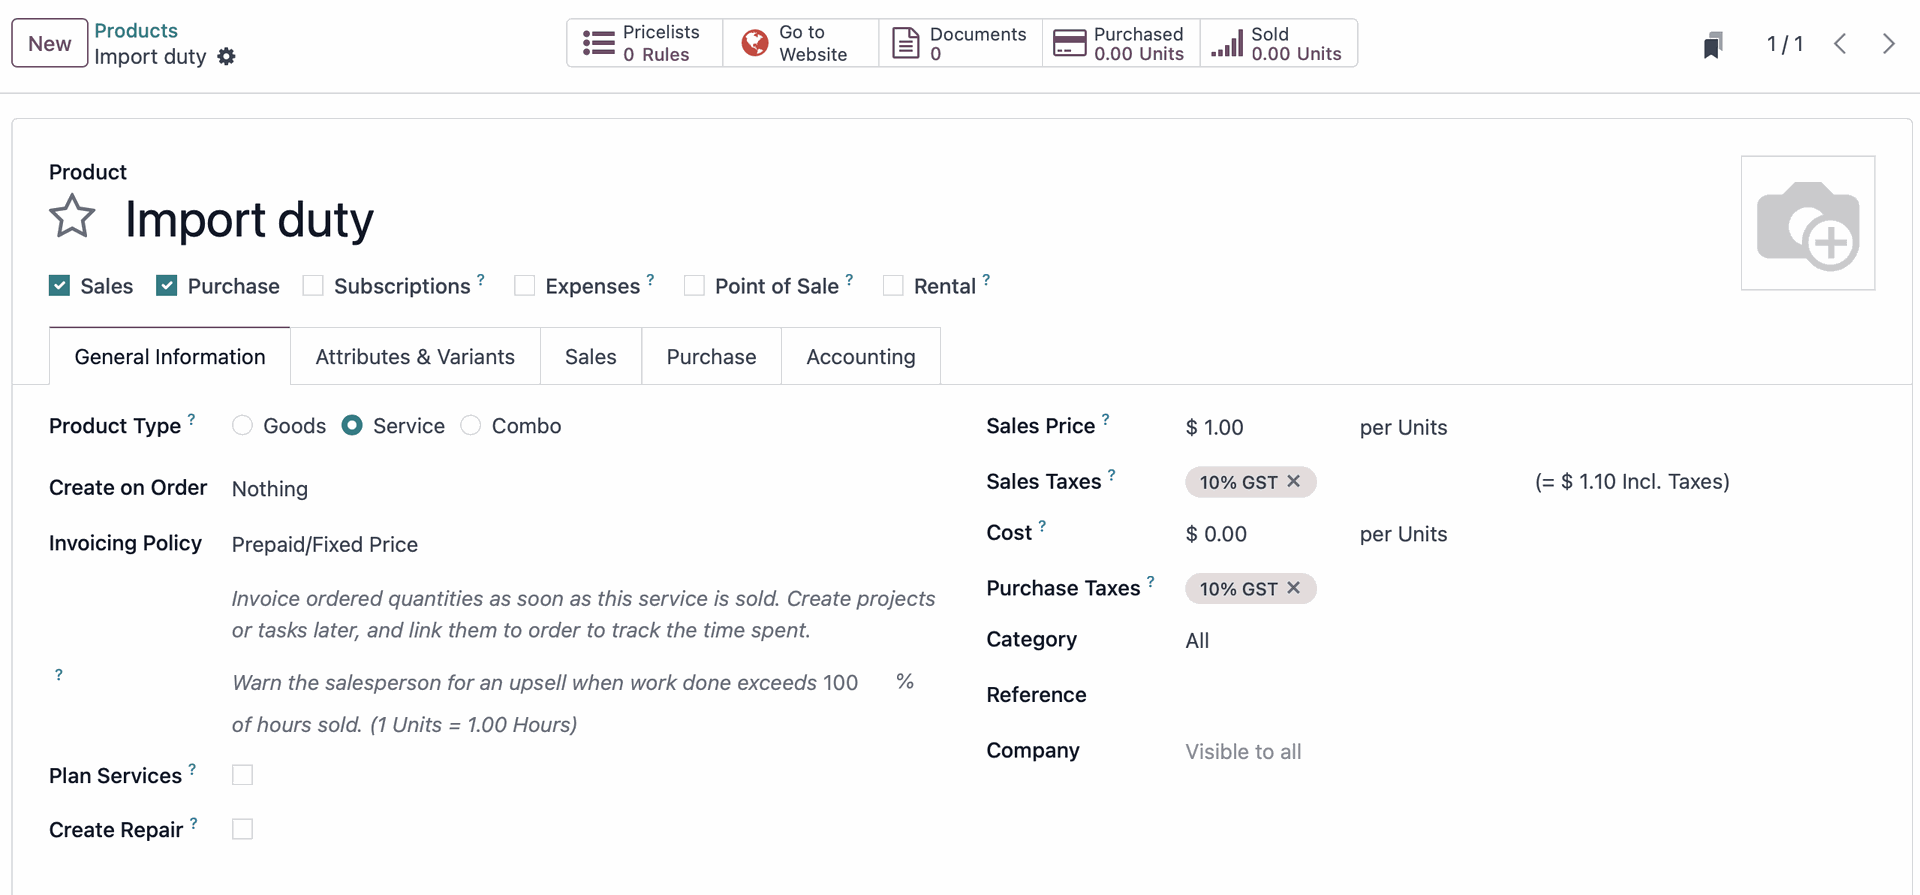
2. Create an "Import Duty" Service Product:
- Go to Products > Products > New and create a new product named "Import Duty" (or similar).
- Set the Product Type to Service.
- In the Purchase tab, check the box labelled "Is a Landed Cost?".
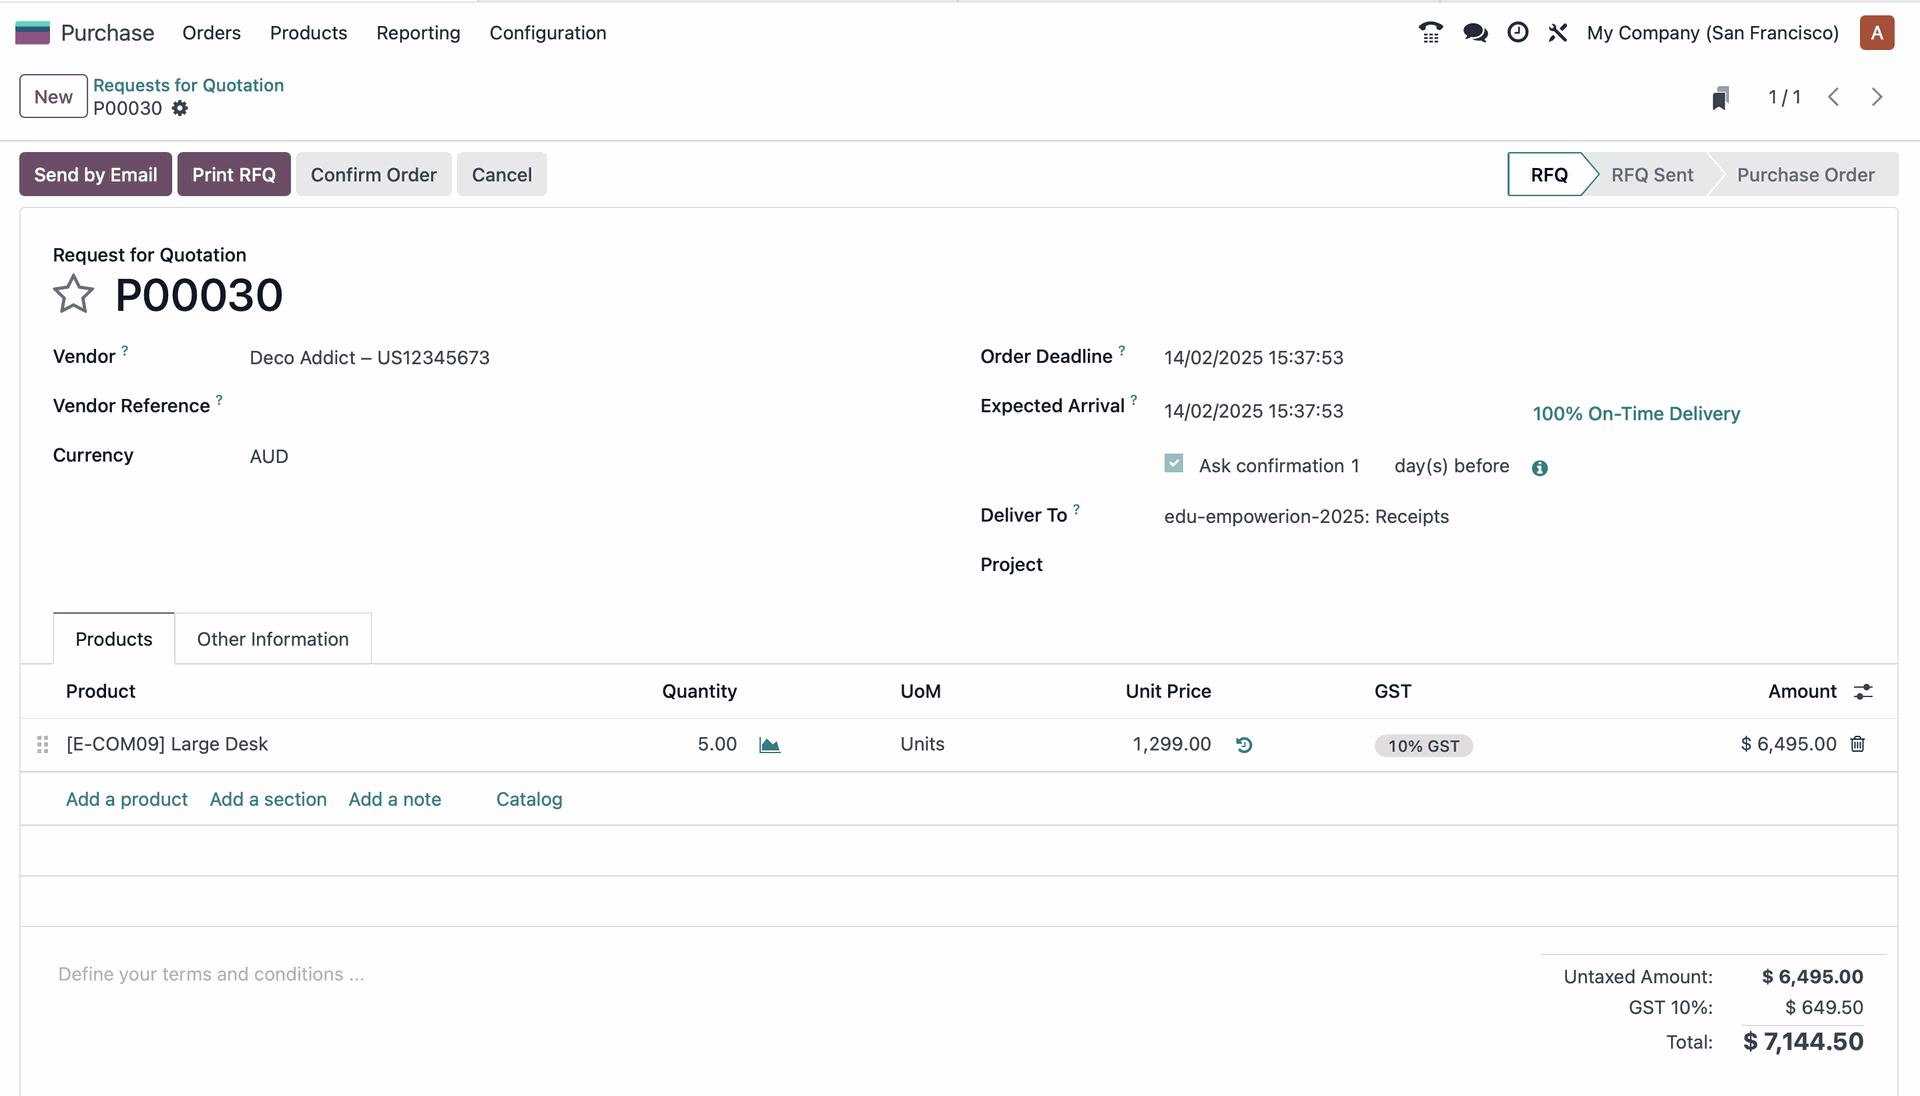
3. Initiate a Purchase Order:
- Go to Purchase > New to create a new Request for Quotation (RFQ).
- Add the product your client wants to purchase.
4. Confirm and Deliver the Order:
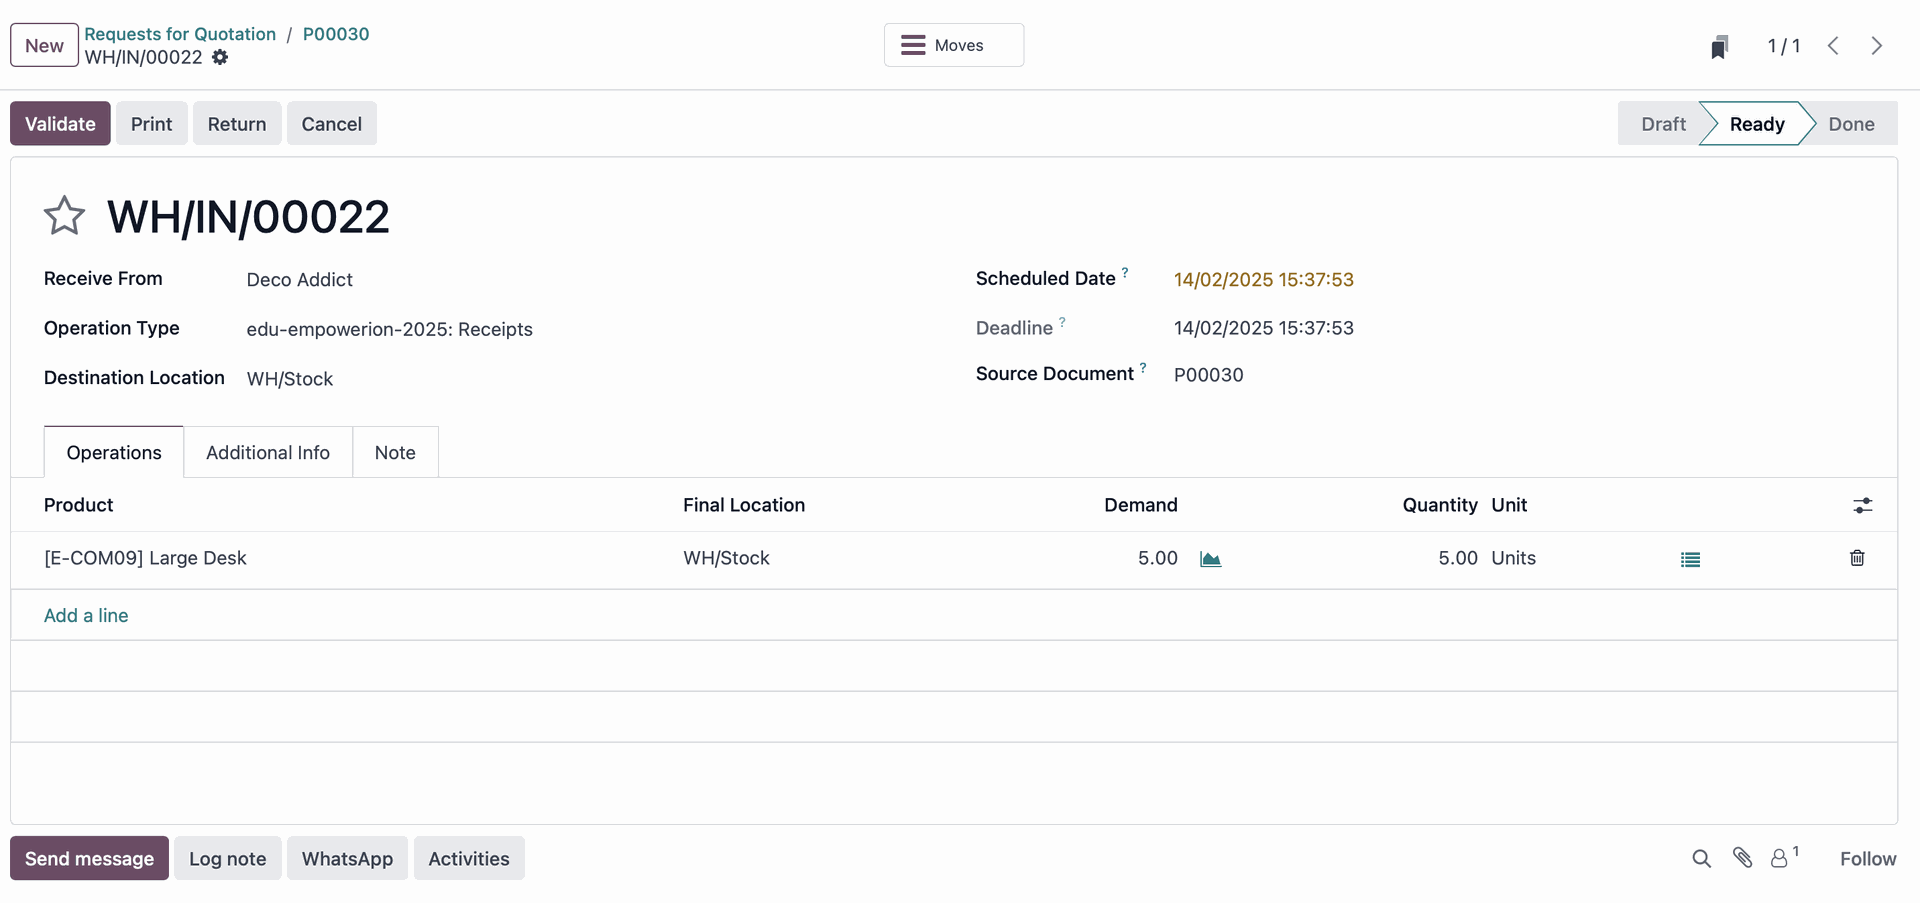
- Confirm the order as you would normally.
- You'll see a "Delivery" smart button appear. Click it and validate the delivery.
- Important: Note the warehouse transfer route (e.g., WH/IN/00022). You'll need this later.
5. Initial Valuation Check:
- Before applying the landed cost, check the initial valuation of the products. Go to Inventory > Reporting > Valuation and observe the current cost. It will reflect the purchase price without any import duty added yet.

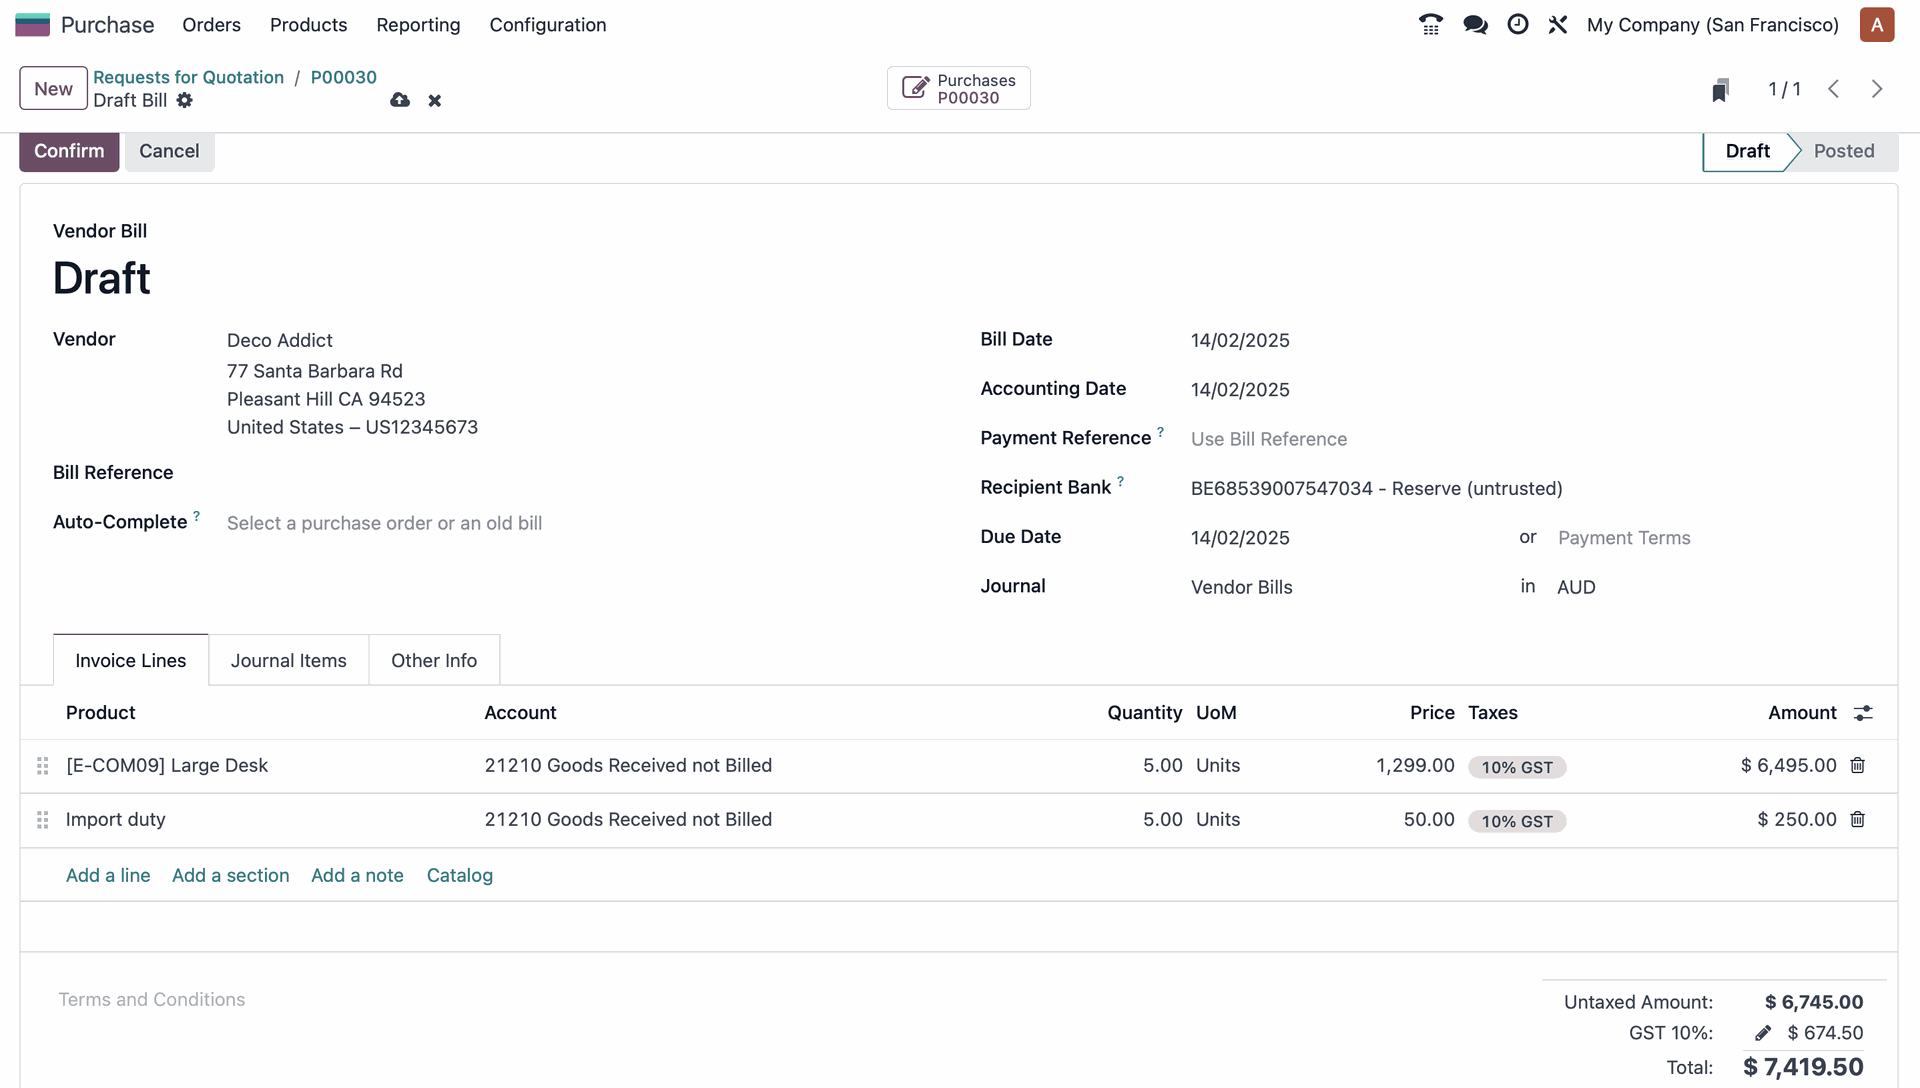
6. Create the Vendor Bill with Import Duty:
- From the Purchase Order, click "Create Bill".
- Add a line item for the "Import Duty" service product you created earlier.
- Set the quantity of the "Import Duty" product to match the quantity of the purchased product.
- Enter the price per unit for the import duty.
- Validate the bill.
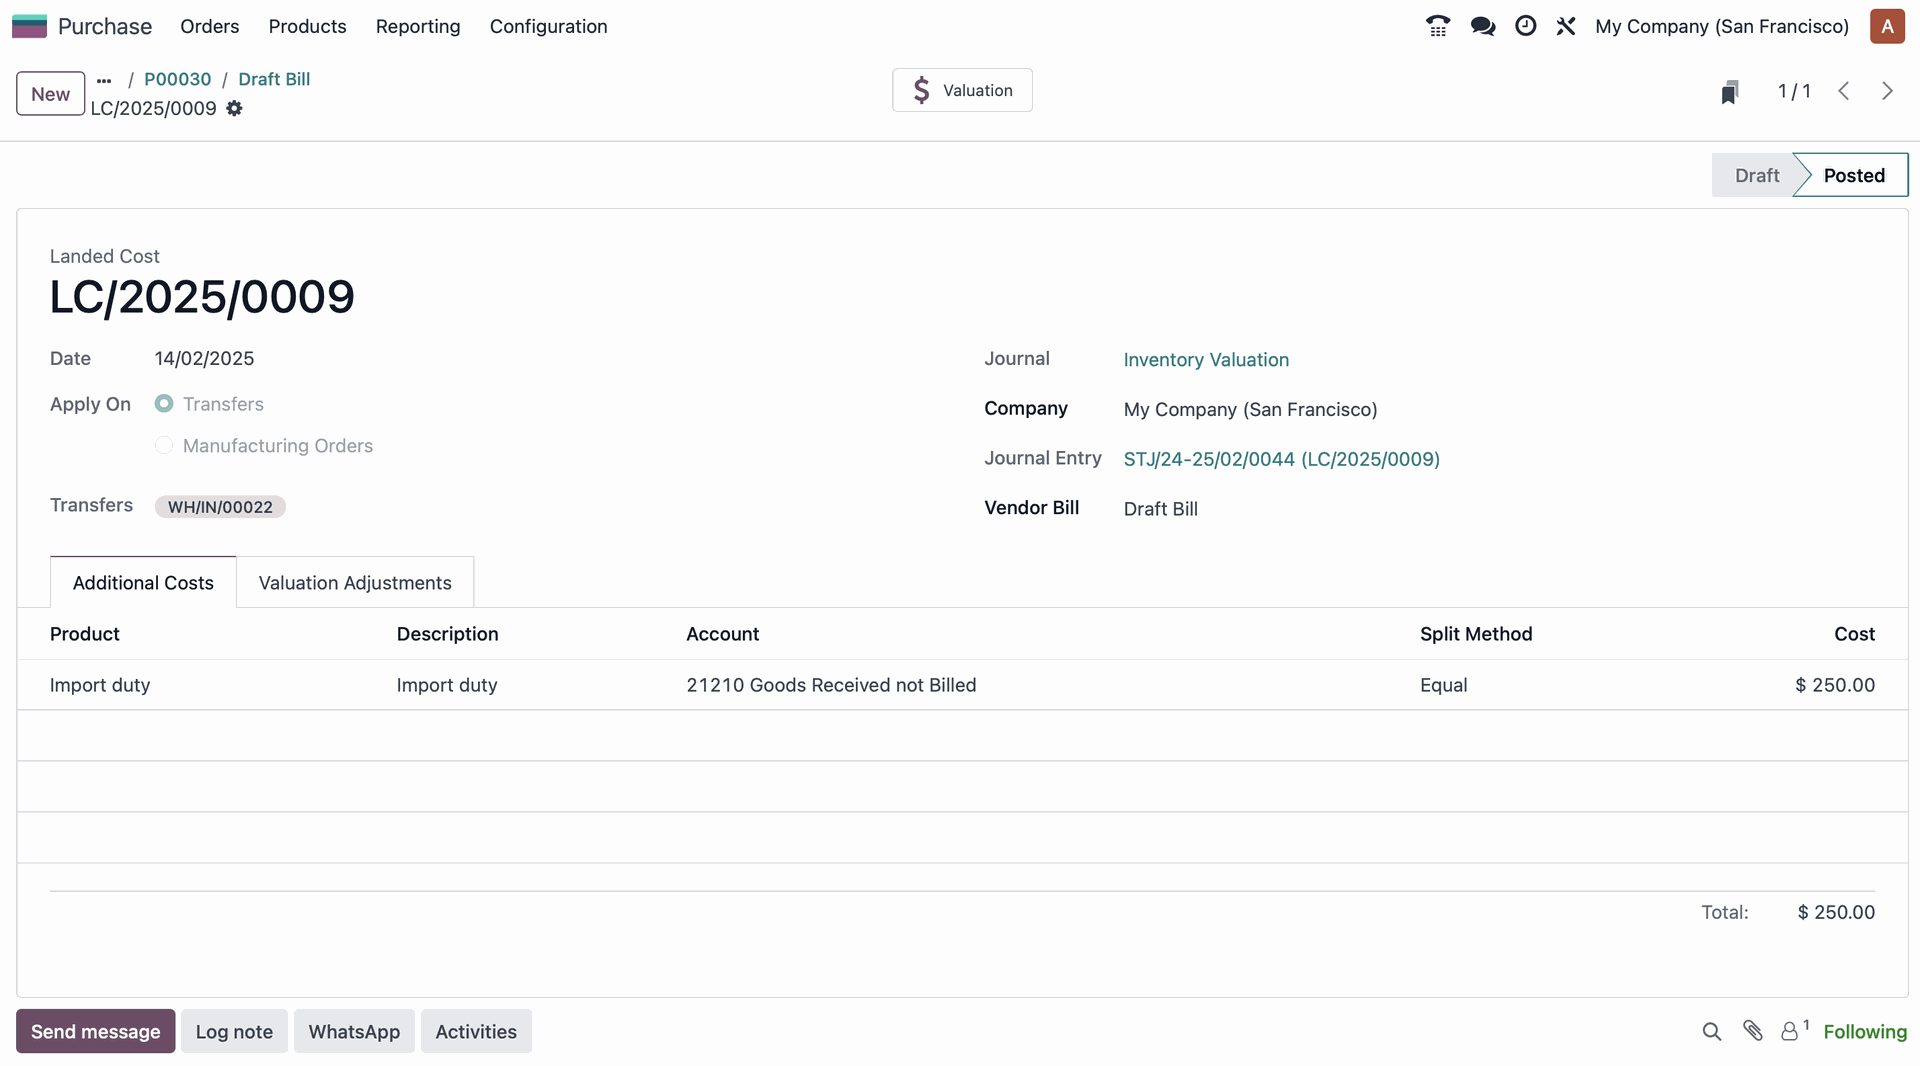
7. Apply the Landed Cost:
- After validating the bill, a "Landed Costs" button will appear. Click it.
- In the Landed Cost form, in the Transfer line, select the warehouse transfer route you noted earlier (e.g., WH/IN/00022).
- Validate the Landed Cost.
8. Review the Updated Valuation:
- Go back to Inventory > Reporting > Valuation. You'll now see that the product valuation has been updated to include the import duty.

Benefits of using Odoo's Landed Cost Feature:
- Accurate Product Valuation: Provides a true cost picture for your products.
- Improved Profitability Analysis: Enables more accurate tracking of profit margins.
- Streamlined Operations: Automates the allocation of landed costs, saving time and reducing errors.
- Better Decision-Making: Empowers you to make informed pricing and inventory management decisions.
By leveraging Odoo's Landed Cost feature, you can confidently navigate the complexities of international business and accurately account for all associated expenses.
Enjoying this Odoo Power Tips series? Talk to one of our experts at Empowerion (Odoo Partner in Melbourne) and let us show you how to unlock accurate product valuation with Odoo!